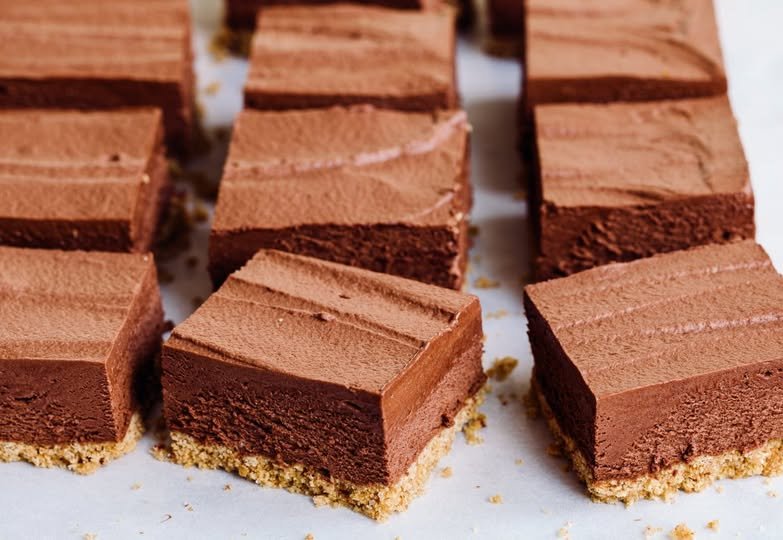
If you love rich, creamy chocolate desserts but don’t want to turn on the oven, these No-Bake Chocolate Mousse Bars are the perfect treat. They feature a buttery chocolate cookie crust topped with an airy, silky chocolate mousse and finished with a layer of whipped cream or chocolate shavings.
These bars are easy to prepare, make ahead beautifully, and are ideal for birthdays, holidays, dinner parties, or whenever a serious chocolate craving strikes.
Ingredients
For the Chocolate Cookie Crust
- 2 cups chocolate cookie crumbs
- 5 tablespoons unsalted butter, melted
- 2 tablespoons granulated sugar, optional
- Pinch of salt
For the Chocolate Mousse
- 8 ounces semi-sweet or dark chocolate, finely chopped
- ¼ cup whole milk
- 1 teaspoon vanilla extract
- 1½ cups heavy whipping cream, cold
- ¼ cup powdered sugar
- Pinch of salt
For the Topping
- ½ cup heavy whipping cream
- 2 tablespoons powdered sugar
- ½ teaspoon vanilla extract
- Chocolate shavings or cocoa powder, for garnish
How to Make No-Bake Chocolate Mousse Bars
Step 1: Prepare the Pan
Line an 8-inch or 9-inch square baking pan with parchment paper, leaving some overhang on the sides.
The parchment makes it much easier to lift the chilled dessert from the pan before slicing.
Step 2: Make the Chocolate Cookie Crust
Place the chocolate cookies in a food processor and pulse until they become fine crumbs.
Transfer the crumbs to a bowl and add the melted butter, sugar if using, and a small pinch of salt.
Mix until the crumbs are evenly coated and resemble wet sand.
Pour the mixture into the prepared pan.
Press it firmly into an even layer using the bottom of a glass or measuring cup.
Refrigerate the crust for at least 20–30 minutes while preparing the mousse.
Step 3: Melt the Chocolate
Place the chopped chocolate in a heatproof bowl.
Heat the milk in a small saucepan over medium-low heat until it is hot but not boiling.
Pour the hot milk over the chocolate and let it sit for about 1 minute.
Stir gently until the chocolate is completely melted and smooth.
Add the vanilla extract and a pinch of salt.
Allow the chocolate mixture to cool until it is slightly warm or close to room temperature.
Do not add very hot chocolate to whipped cream because it can cause the cream to lose its volume.
Step 4: Whip the Cream
Pour the cold heavy cream into a large mixing bowl.
Add the powdered sugar.
Beat with an electric mixer until soft peaks form.
Be careful not to overwhip the cream.
Step 5: Make the Chocolate Mousse
Add a small amount of the whipped cream to the cooled chocolate mixture and gently fold it together.
Then gradually fold the chocolate mixture into the remaining whipped cream.
Use a spatula and gentle movements to keep the mousse light and airy.
Continue folding until the mixture is smooth and evenly chocolate-colored.
Step 6: Assemble the Bars
Remove the chilled crust from the refrigerator.
Spoon the chocolate mousse over the crust and spread it into an even layer.
Smooth the top with a spatula.
Cover the pan and refrigerate for at least 4–6 hours, preferably overnight.
The mousse needs sufficient time to firm up before slicing.
Step 7: Add the Topping
When ready to serve, whip the remaining heavy cream with powdered sugar and vanilla until soft peaks form.
Spread or pipe the whipped cream over the chilled mousse.
Finish with chocolate shavings, cocoa powder, or finely chopped chocolate.
Step 8: Slice and Serve
Use the parchment paper to carefully lift the dessert from the pan.
For cleaner slices, use a sharp knife warmed under hot water and then dried thoroughly.
Cut into bars and serve chilled.
Tips for Perfect Chocolate Mousse Bars
Use good-quality chocolate: Chocolate is the main flavor, so a good semi-sweet or dark chocolate makes a noticeable difference.
Cool the melted chocolate: Chocolate that is too hot can melt the whipped cream and prevent the mousse from setting properly.
Fold gently: Overmixing can deflate the whipped cream and make the mousse heavier.
Chill thoroughly: Give the bars several hours in the refrigerator before cutting.
Line the pan: Parchment paper makes removing the finished bars much easier.
Use a hot knife: Wiping a warm, clean knife between cuts helps create neat-looking dessert bars.
Easy Variations
Peanut Butter Chocolate Mousse Bars
Spread a thin layer of creamy peanut butter over the cookie crust before adding the chocolate mousse.
Mint Chocolate Bars
Add a small amount of peppermint extract to the mousse and garnish with chocolate curls.
White Chocolate Version
Replace the semi-sweet chocolate with white chocolate. Reduce the powdered sugar slightly because white chocolate is naturally sweeter.
Espresso Chocolate Bars
Add 1 teaspoon of instant espresso powder to the melted chocolate for a deeper chocolate flavor.
Raspberry Chocolate Bars
Add fresh raspberries to the top just before serving for a fruity contrast to the rich chocolate.
Oreo-Style Bars
Use chocolate sandwich cookies for the crust and add a few crushed cookies over the whipped cream topping.
How to Store
Keep the mousse bars covered and refrigerated.
They are best enjoyed within about 3 days for the freshest texture and flavor.
If you need to store them longer, you can freeze the bars in a tightly sealed freezer-safe container. Separate layers with parchment paper.
Thaw them in the refrigerator before serving.
Can You Make These Ahead?
Yes. These bars are particularly convenient for entertaining because they need several hours to chill.
You can prepare them the day before serving and keep them refrigerated overnight.
For the cleanest presentation, add the whipped cream topping and chocolate garnish shortly before serving.
Frequently Asked Questions
Do No-Bake Chocolate Mousse Bars need to be refrigerated?
Yes. The mousse contains whipped cream and needs to remain chilled to maintain its texture.
Can I use milk chocolate?
Yes, but the finished dessert will be sweeter. Semi-sweet or dark chocolate provides a stronger chocolate flavor and balances the sweetness of the crust and topping.
Why didn’t my mousse set?
The chocolate may have been too warm when combined with the whipped cream, the cream may not have been whipped enough, or the dessert may simply need more chilling time.
Can I use store-bought whipped topping?
Yes. Prepared whipped topping can be used as a shortcut, although freshly whipped cream provides a lighter texture and fresher flavor.
Can I make these without a food processor?
Absolutely. Place the cookies in a sealed bag and crush them with a rolling pin until they become fine crumbs.
How do I get clean slices?
Chill the bars thoroughly and use a sharp knife. Warming and wiping the knife between cuts can help produce cleaner edges.
Serving Ideas
These chocolate mousse bars are delicious on their own, but you can make them extra special with:
- Fresh strawberries
- Raspberries
- Chocolate curls
- Cocoa powder
- Powdered sugar
- Whipped cream
- Caramel sauce
- Fresh mint
- Chopped toasted nuts
Final Thoughts
These No-Bake Chocolate Mousse Bars combine a crunchy chocolate cookie crust with an incredibly creamy and airy chocolate mousse for an impressive dessert that requires no oven.
They’re simple enough for a weeknight chocolate craving but elegant enough for a holiday table or dinner party. Prepare them ahead, let them chill thoroughly, add your favorite toppings, and slice them into rich, indulgent bars whenever you’re ready to serve.
SEO Details
SEO Title: No-Bake Chocolate Mousse Bars – Easy Creamy Dessert
Meta Description: Make rich and creamy No-Bake Chocolate Mousse Bars with a chocolate cookie crust, silky mousse, and whipped cream topping. Perfect for any occasion.
Focus Keyword: No-Bake Chocolate Mousse Bars
Slug: no-bake-chocolate-mousse-bars
Category: Dessert Recipes
Tags: no-bake dessert, chocolate mousse bars, chocolate dessert, no-bake chocolate bars, easy dessert, creamy chocolate dessert, chocolate mousse, dessert bars