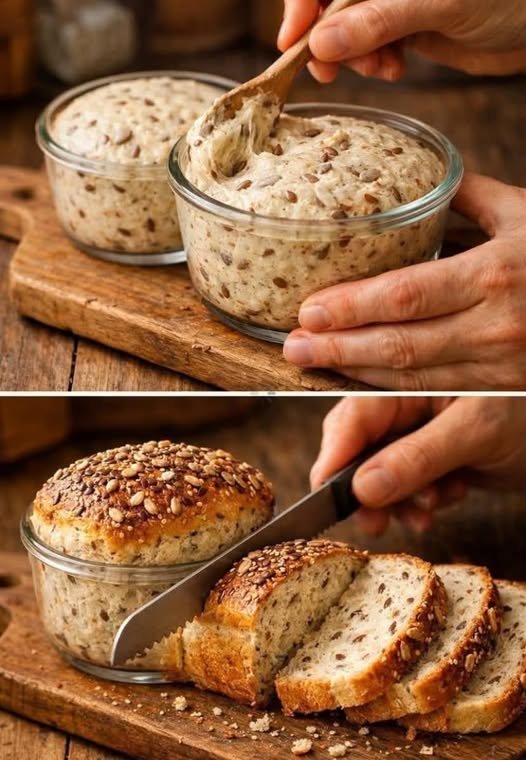
There’s something incredibly satisfying about baking a rustic loaf at home, especially when it comes together with simple ingredients and very little hands-on work. This Quick-Cup Seedy Artisan Bread has a crisp, golden crust, a soft and chewy center, and plenty of crunchy seeds throughout.
Unlike traditional artisan bread recipes that require extensive kneading and long preparation, this version is designed to be simple and approachable. It’s perfect for breakfast, sandwiches, soups, or simply spreading with butter while the bread is still slightly warm.
Ingredients
For the Bread
- 3 cups all-purpose or bread flour
- 1 ½ teaspoons salt
- 1 teaspoon instant yeast
- 1 ½ cups warm water
- 1 tablespoon honey or maple syrup
- 1 tablespoon olive oil
For the Seed Mixture
- 2 tablespoons sunflower seeds
- 2 tablespoons pumpkin seeds
- 1 tablespoon sesame seeds
- 1 tablespoon flaxseeds
- 1 tablespoon chia seeds
- 1 tablespoon poppy seeds, optional
You can adjust the seed mixture according to what you have available.
For the Topping
- 1–2 tablespoons mixed seeds
- 1 teaspoon olive oil or water, optional
Instructions
1. Prepare the Dough
In a large mixing bowl, combine the flour, salt, and instant yeast.
Add the warm water, honey, and olive oil. Stir with a wooden spoon or sturdy spatula until the ingredients come together into a sticky, rough dough.
Don’t worry if the dough looks messy. This is a low-knead bread, so there’s no need to work it until perfectly smooth.
2. Add the Seeds
Add the sunflower seeds, pumpkin seeds, sesame seeds, flaxseeds, chia seeds, and poppy seeds if using.
Fold the dough several times with a spoon or your hands until the seeds are evenly distributed.
Cover the bowl with plastic wrap or a clean kitchen towel.
3. Let the Dough Rise
Allow the dough to rest at room temperature for approximately 1 to 1½ hours, or until it has noticeably expanded and looks puffy.
For a deeper artisan flavor, you can refrigerate the covered dough for several hours or overnight and bake it the following day.
4. Shape the Loaf
Lightly flour your work surface and transfer the dough onto it.
Fold the edges toward the center several times, then gently shape the dough into a round or oval loaf.
Avoid adding too much flour. A slightly sticky dough helps produce a moist, airy interior.
5. Prepare the Oven
Place a Dutch oven or heavy oven-safe pot with its lid inside the oven.
Preheat the oven to 450°F (230°C) and allow the pot to heat thoroughly.
The hot covered pot helps create the steam needed for a beautifully crisp artisan crust.
6. Add the Topping
Carefully transfer the shaped dough onto a piece of parchment paper.
Brush or lightly mist the surface with water or olive oil, then sprinkle the remaining mixed seeds over the top.
For a classic bakery appearance, make one shallow slash across the top using a sharp knife.
7. Bake
Carefully lower the dough into the preheated Dutch oven.
Cover with the lid and bake for 25 minutes.
Remove the lid and continue baking for another 15–20 minutes, or until the loaf is deeply golden brown and sounds hollow when tapped.
8. Cool Before Slicing
Remove the bread from the pot and place it on a wire rack.
Allow it to cool for at least 30–45 minutes before slicing.
Although it’s tempting to cut into a freshly baked loaf immediately, cooling allows the interior to finish setting and helps prevent a gummy texture.
Tips for the Best Seedy Artisan Bread
Use warm, not hot, water. Extremely hot water can interfere with the yeast.
Don’t overload the dough with seeds. Seeds add wonderful flavor and texture, but excessive amounts can make the loaf dense.
Give it enough rising time. The dough should become noticeably puffy before shaping.
Preheat the Dutch oven properly. A thoroughly heated pot is one of the secrets to achieving a crisp crust.
Let the bread cool. Cutting too early can compress the soft interior.
Easy Variations
Rosemary & Seed Bread
Add 1 teaspoon dried rosemary or 1 tablespoon finely chopped fresh rosemary for a fragrant loaf.
Garlic Herb Bread
Mix in ½ teaspoon garlic powder along with dried oregano, thyme, or Italian seasoning.
Cranberry & Seed Bread
Add a small handful of dried cranberries for a slightly sweet and savory combination.
Whole-Wheat Seedy Bread
Replace up to 1 cup of the all-purpose flour with whole-wheat flour. You may need a little additional water because whole-wheat flour absorbs more liquid.
Cheesy Seed Bread
Add ½ cup shredded cheddar, Parmesan, or another firm cheese to the dough for a richer loaf.
How to Serve It
This bread is delicious served warm with butter, but there are plenty of other ways to enjoy it.
Serve slices with:
- Scrambled or fried eggs
- Avocado and tomatoes
- Cream cheese
- Hummus
- Soup or stew
- Cheese and sliced vegetables
- Chicken or turkey sandwiches
- Olive oil and herbs
The combination of a crisp crust, tender crumb, and toasted seeds makes it particularly good for hearty sandwiches.
How to Store It
Once completely cool, store the bread in a paper bag or loosely covered bread container at room temperature for up to 2–3 days.
For longer storage, slice the loaf and freeze it in an airtight freezer bag for up to 2–3 months. Individual slices can be thawed and toasted whenever needed.
Recipe at a Glance
Prep Time: 10–15 minutes
Rise Time: 1–1½ hours
Bake Time: 40–45 minutes
Cooling Time: 30–45 minutes
Servings: 10–12 slices
Oven Temperature: 450°F (230°C)
Final Thoughts
This Quick-Cup Seedy Artisan Bread is proof that homemade bread doesn’t have to be complicated. With a simple dough, a generous handful of nutritious seeds, and a hot Dutch oven, you can create a rustic loaf with a wonderfully crisp crust and soft, chewy center.
Enjoy it fresh with butter, turn it into your favorite sandwich, or serve it alongside a comforting bowl of soup. Once you try this easy method, homemade artisan bread may become a regular part of your kitchen routine.