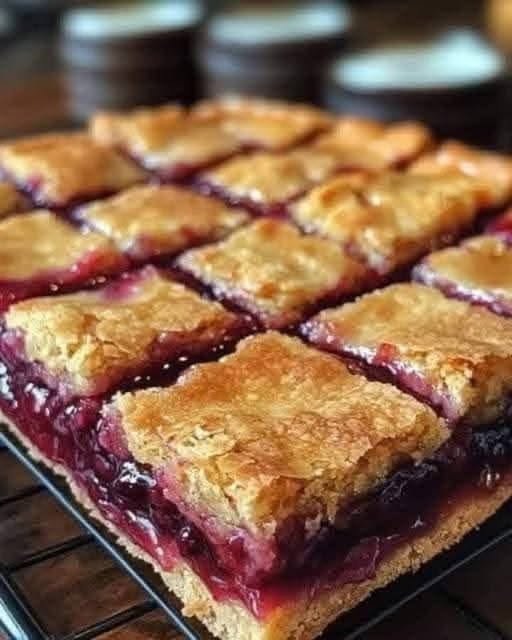
Homemade Cherry Pie Bars
These Homemade Cherry Pie Bars bring all the delicious flavor of classic cherry pie into an easy-to-slice dessert. A buttery, tender crust is layered with sweet-tart cherry filling and finished with a simple almond glaze. They’re perfect for potlucks, holidays, bake sales, or whenever you want cherry pie without making an entire pie. (Barbara Bakes™)
Ingredients
For the Cherry Filling
- 4 cups pitted fresh or frozen cherries
- ¾ cup granulated sugar
- 2 tablespoons cornstarch
- 1 tablespoon lemon juice
- 1 teaspoon vanilla extract
- ¼ teaspoon almond extract
- Pinch of salt
For the Bars
- 1 cup unsalted butter, softened
- 1½ cups granulated sugar
- 4 large eggs
- 2 teaspoons vanilla extract
- ¼ teaspoon almond extract
- 2 cups all-purpose flour
- 1 teaspoon salt
- 1 teaspoon baking powder
For the Glaze
- 1 cup powdered sugar
- 2 tablespoons milk
- ¼ teaspoon almond extract
Directions
1. Make the Cherry Filling
Place the cherries, sugar, lemon juice, and salt in a medium saucepan.
Cook over medium heat, stirring occasionally, until the cherries begin releasing their juices.
In a small bowl, whisk the cornstarch with 2 tablespoons of cold water until smooth.
Pour the slurry into the cherries while stirring continuously.
Cook for another 2–4 minutes, until the filling thickens and looks glossy.
Remove from the heat and stir in the vanilla and almond extracts.
Set aside to cool. The filling should be cool or barely warm before assembling the bars.
2. Prepare the Pan
Preheat the oven to 350°F (175°C).
Grease a 9×13-inch baking pan and line it with parchment paper, leaving some overhang on the sides for easy removal.
3. Make the Batter
In a large bowl, beat the softened butter and sugar for approximately 2–3 minutes, until light and fluffy.
Add the eggs one at a time, mixing well after each addition.
Stir in the vanilla and almond extracts.
In a separate bowl, whisk together the flour, salt, and baking powder.
Gradually add the dry ingredients to the butter mixture, mixing just until combined.
Don’t overmix the batter.
4. Build the Bottom Layer
Spread approximately two-thirds of the batter evenly across the prepared pan.
Use a spatula to smooth it into an even layer.
5. Add the Cherry Filling
Spoon the cooled cherry filling over the batter.
Spread it gently into an even layer, leaving a small border around the edges if possible.
6. Add the Top Layer
Drop spoonfuls of the remaining batter over the cherries.
You don’t need to completely cover every bit of the filling. Leaving small gaps allows some of the beautiful red cherry filling to peek through as the bars bake.
7. Bake
Place the pan in the preheated oven.
Bake for approximately 30–40 minutes, or until the edges are golden brown and the center is set.
If you’re using a glass baking dish, the bars may require a little additional baking time.
Don’t overbake—the center should remain tender.
8. Cool Completely
Place the pan on a wire rack and allow the bars to cool completely.
For the cleanest slices, let them cool for at least 1 hour before glazing and cutting.
9. Make the Glaze
In a small bowl, whisk together the powdered sugar, milk, and almond extract.
If the glaze is too thick, add a few drops of milk.
If it’s too thin, add a little more powdered sugar.
You want a smooth glaze that’s thick enough to drizzle but still easy to spread.
10. Glaze and Slice
Drizzle the glaze over the cooled cherry bars.
Allow it to set for approximately 10–15 minutes.
Use the parchment paper to lift the entire dessert from the pan, then cut into squares or rectangles.
Tips for Perfect Cherry Pie Bars
Cool the filling first: Hot cherry filling can make the batter difficult to work with and affect the final texture.
Don’t overmix the batter: Mix only until the flour disappears for soft, tender bars.
Use fresh or frozen cherries: Both work well; frozen cherries are especially convenient when fresh cherries aren’t available. (Feel Good Foodie)
Don’t cut them while hot: Allowing the bars to cool completely helps the cherry layer firm up and makes cleaner slices.
Add the glaze last: Drizzling over completely cooled bars gives you a prettier finish.
Easy Variations
Almond Cherry Bars
Increase the almond extract slightly for a stronger classic cherry-almond flavor.
Chocolate Cherry Bars
Add mini chocolate chips to the batter before baking.
Cherry Pecan Bars
Sprinkle ½ cup chopped pecans over the top before baking.
Lemon Cherry Bars
Replace the almond extract in the glaze with lemon juice and add a little lemon zest.
Crumb-Topped Cherry Bars
Reserve some of the batter, crumble it over the cherry layer, and bake until golden.
Storage
Store the finished bars in an airtight container at room temperature for up to 2 days, or refrigerate for up to 4 days.
For longer storage, wrap individual bars well and freeze them for up to 2–3 months. Thaw in the refrigerator before serving.
These homemade Cherry Pie Bars have a buttery, tender base, juicy cherry center, and sweet almond glaze—everything you love about cherry pie in an easy handheld dessert.