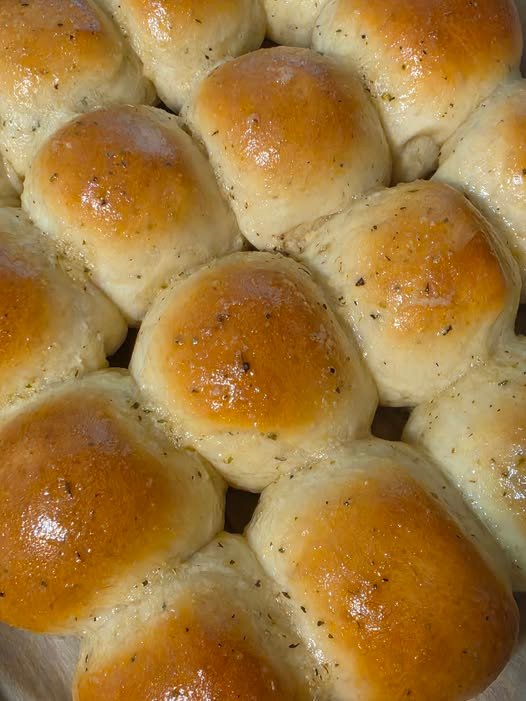
Soft, fluffy, buttery, and packed with garlicky flavor, these homemade Garlic Butter Rolls are the kind of bread that disappears almost as soon as it reaches the table. The dough bakes into pillowy rolls with lightly golden tops, while a generous brushing of garlic butter adds irresistible flavor and keeps them wonderfully tender.
They’re easy enough for a weekend baking project but special enough for holidays, family dinners, or a cozy homemade meal.
Why You’ll Love These Garlic Butter Rolls
- Soft and fluffy inside with a lightly golden exterior
- Rich buttery garlic flavor
- Made with simple pantry ingredients
- Perfect alongside soups, pasta, chicken, steak, or roasted vegetables
- Can be prepared ahead of time
- Delicious warm from the oven
- Great for sandwiches and sliders too
Ingredients
For the Rolls
- 3 ½ cups all-purpose flour
- 2 ¼ teaspoons instant yeast
- 2 tablespoons granulated sugar
- 1 teaspoon salt
- 1 cup warm milk
- ¼ cup unsalted butter, melted
- 1 large egg
- 2 tablespoons plain yogurt or sour cream
For the Garlic Butter
- 4 tablespoons unsalted butter, melted
- 3–4 cloves garlic, finely minced
- 1 tablespoon fresh parsley, finely chopped
- ¼ teaspoon salt
- ¼ teaspoon dried Italian seasoning or dried oregano, optional
Optional Topping
- 1–2 tablespoons grated Parmesan cheese
- Extra chopped parsley
How to Make Soft Garlic Butter Rolls
1. Prepare the Dough
In a large mixing bowl, combine the warm milk, sugar, and instant yeast. Let it sit for about 5 minutes.
The milk should feel comfortably warm, not hot. Very hot liquid can damage the yeast.
Add the melted butter, egg, and yogurt. Whisk until combined.
Gradually add the flour and salt, mixing until a soft dough forms.
2. Knead the Dough
Transfer the dough to a lightly floured surface and knead for about 8–10 minutes.
You can also use a stand mixer fitted with a dough hook and knead on low to medium speed for approximately 6–8 minutes.
The dough should become smooth, soft, and slightly tacky but should not be excessively sticky.
Avoid adding too much extra flour. A slightly soft dough is one of the secrets to tender rolls.
3. Let the Dough Rise
Place the dough in a lightly greased bowl.
Cover with a clean kitchen towel or plastic wrap and place it somewhere warm.
Allow it to rise for about 1–1½ hours, or until it has roughly doubled in size.
The exact rising time depends on the temperature of your kitchen.
4. Shape the Rolls
Once the dough has risen, gently press it down to release excess air.
Divide the dough into 12 equal portions.
Shape each portion into a smooth ball by pulling the edges underneath and gently rolling it against the work surface.
Arrange the rolls in a lightly greased 9×13-inch baking dish, leaving a little space between them.
5. Second Rise
Cover the shaped rolls and let them rise again for about 30–45 minutes.
They should look noticeably puffy and soft.
Meanwhile, preheat your oven to 375°F (190°C).
6. Make the Garlic Butter
In a small bowl, combine the melted butter, minced garlic, chopped parsley, salt, and optional Italian seasoning.
Set aside.
7. Bake the Rolls
Brush the tops of the risen rolls lightly with some of the garlic butter.
Place them in the preheated oven and bake for approximately 18–23 minutes, or until the tops are lightly golden and the rolls are cooked through.
Be careful not to overbake them. Overbaking can make homemade rolls dry rather than soft.
8. Add More Garlic Butter
As soon as the rolls come out of the oven, generously brush them with the remaining garlic butter.
For an extra-special finish, sprinkle the tops with Parmesan cheese and fresh parsley.
Let the rolls rest for about 5 minutes before serving.
Tips for Extra-Soft Rolls
Use Warm, Not Hot, Milk
The milk should be warm enough to encourage yeast activity but not so hot that it damages the yeast.
Don’t Add Too Much Flour
This is one of the most important tips. Adding excessive flour can produce dense, heavy rolls.
The dough should remain soft and slightly tacky during kneading.
Give the Dough Enough Time to Rise
A proper first rise develops both texture and flavor. If your kitchen is cool, the dough may need additional time.
Don’t Overbake
Remove the rolls once they’re lightly golden and cooked through. They will continue to firm slightly as they cool.
Brush With Butter Twice
A little garlic butter before baking adds flavor, while a generous coating immediately after baking gives the rolls their signature buttery finish.
Variations
Cheesy Garlic Rolls
Add shredded mozzarella or cheddar to the center of each dough ball before shaping.
You can also sprinkle Parmesan over the rolls during the final few minutes of baking.
Herb Garlic Rolls
Add fresh parsley, cilantro, rosemary, or thyme to the garlic butter.
Spicy Garlic Rolls
Add a pinch of red pepper flakes or a small amount of chili powder to the garlic butter.
Creamy Garlic Rolls
Spread a thin layer of softened cream cheese inside each piece of dough before rolling and shaping.
Dinner Rolls With Honey Butter
For a slightly sweeter version, replace the garlic butter with honey butter or combine a small amount of honey with the garlic butter.
What to Serve With Garlic Butter Rolls
These rolls are especially delicious with:
- Creamy tomato soup
- Chicken soup
- Beef stew
- Roast chicken
- Grilled or roasted steak
- Creamy pasta
- Baked chicken
- Roasted vegetables
- Mashed potatoes
- Lasagna
- Chicken Alfredo
- Seafood dishes
They can also be sliced horizontally and used to make small sandwiches.
Make-Ahead Instructions
You can prepare the dough a day ahead.
After shaping the rolls, cover the baking dish tightly and refrigerate overnight.
The following day, remove the rolls from the refrigerator and allow them to sit at room temperature until they become puffy. This may take approximately 45–90 minutes depending on room temperature.
Brush with garlic butter and bake as directed.
Storage
Store leftover rolls in an airtight container at room temperature for up to 2 days.
For longer storage, refrigerate them for up to 4–5 days.
To freeze, allow completely baked rolls to cool, then place them in a freezer-safe bag or container. Freeze for up to 2–3 months.
Reheat in a low oven until warm. A little extra melted butter brushed over the rolls before reheating helps restore their softness.
Frequently Asked Questions
Can I use active dry yeast?
Yes. Active dry yeast works well, although you may want to let it dissolve in the warm milk for about 5–10 minutes before continuing with the recipe.
Why did my rolls turn out dense?
The most common causes are too much flour, insufficient kneading, inadequate rising time, or yeast that is no longer active.
Can I make these without an egg?
Yes. The egg contributes richness and softness, but you can omit it. The dough may have a slightly different texture.
Can I use salted butter?
Yes. If using salted butter, reduce the amount of added salt slightly.
How do I know when the rolls are fully baked?
They should be lightly golden on top and feel set when gently pressed. The center should not feel doughy.
Can I add cheese?
Absolutely. Mozzarella, cheddar, Parmesan, or a combination can turn these into delicious cheesy garlic rolls.
Recipe at a Glance
Prep Time: 20 minutes
Rise Time: 1½–2 hours
Bake Time: 18–23 minutes
Total Time: About 2½ hours
Yield: 12 soft rolls
Oven Temperature: 375°F (190°C)
Final Thoughts
These Soft Garlic Butter Rolls are proof that homemade bread doesn’t have to be complicated. With a simple yeast dough, a little patience, and plenty of garlic butter, you can create incredibly soft rolls with a tender interior and rich, savory flavor.
Serve them warm alongside your favorite meal, and don’t be surprised if everyone reaches for a second one.
SEO Title
Soft Garlic Butter Rolls – Fluffy, Buttery & Easy Homemade Bread
Meta Description
Make soft, fluffy Garlic Butter Rolls at home with a simple yeast dough, melted butter, fresh garlic, and herbs. Perfect for dinner, soups, pasta, and special meals.
Focus Keyphrase
Soft Garlic Butter Rolls
Suggested Slug
soft-garlic-butter-rolls