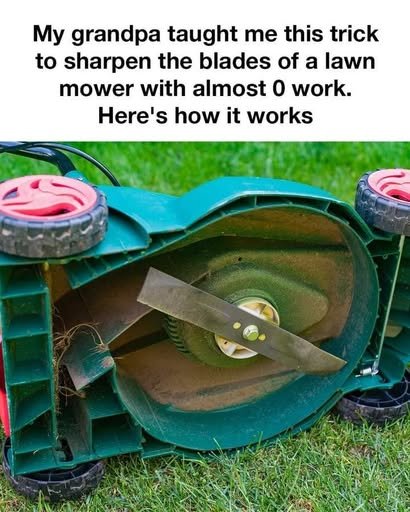
My grandpa always believed you didn’t need expensive equipment to keep your tools working well. One of his favorite lawn-care lessons was that a dull lawn mower blade doesn’t always need to be replaced—it can often be sharpened at home with a simple technique and a little patience.
A sharp mower blade gives you a cleaner cut, helps the grass recover more evenly, and can make mowing feel noticeably easier. The good news is that sharpening doesn’t have to become a complicated workshop project.
Here’s the simple method my grandpa used, along with the safety steps that should never be skipped.
Why Sharp Lawn Mower Blades Matter
A mower blade becomes dull after repeated contact with grass, soil, small stones, sticks, and other debris. When the cutting edge gets dull, the mower may tear or bruise the grass instead of making a clean cut.
A dull blade can also cause:
- Uneven-looking grass
- Ragged or shredded grass tips
- More effort while mowing
- Increased vibration
- Longer mowing time
- Greater stress on the mower
You don’t necessarily need a razor-sharp blade. A properly sharpened mower blade should have a clean, consistent cutting edge while retaining its original shape and balance.
Grandpa’s Almost-No-Work Sharpening Trick
The basic idea is simple: instead of aggressively grinding away at the blade, use a file or suitable sharpening tool and let repeated, controlled strokes do the work.
What You’ll Need
- A metal file or mower-blade sharpening tool
- Work gloves
- Safety glasses
- A wrench or socket set
- A block of wood
- A vise or another secure way to hold the blade
- A blade-balancing tool, if available
A bench grinder can also be used, but it requires more care because removing too much metal or creating excessive heat can damage the blade.
Step 1: Turn the Mower Off Completely
Safety comes first.
For a gasoline mower, disconnect the spark-plug wire before working around the blade. For an electric or battery mower, disconnect it from its power source and remove the battery according to the manufacturer’s instructions.
Never rely solely on the mower’s normal controls to prevent the blade from moving.
Step 2: Remove the Blade
Tilt or position the mower according to the manufacturer’s instructions.
Use a block of wood to prevent the blade from rotating while you loosen the retaining bolt. Carefully remove the blade and remember how it was positioned.
Taking a quick photo before removing it can help you reinstall it correctly.
Step 3: Clean Off the Blade
Use a stiff brush or rag to remove grass, dirt, and debris.
Cleaning the blade makes the cutting edge much easier to see. It also helps you identify dents, cracks, severe corrosion, or other damage.
If the blade is cracked, badly bent, or excessively worn, sharpening it may not be appropriate. Replacement is safer in those situations.
Step 4: Secure the Blade
This is where many people make the process harder than it needs to be.
Secure the blade firmly in a vise. Keep your hands away from the cutting edge and make sure the blade cannot move while you’re working.
Do not try to hold the blade in your hand while filing it.
Step 5: Follow the Existing Cutting Angle
This is the real trick.
Don’t try to completely redesign the edge. Look at the existing bevel and follow that same angle with your file or sharpening tool.
Push the file along the cutting edge in controlled strokes, working from the inside toward the tip.
You don’t need to remove a huge amount of metal. The goal is simply to restore a clean, consistent edge.
The Golden Rule
Follow the blade’s original angle instead of trying to make it razor sharp.
A mower blade isn’t a kitchen knife. It needs a durable cutting edge that can withstand contact with grass and occasional debris.
Step 6: Repeat on the Other Side
Sharpen the opposite cutting edge using the same number of strokes and approximately the same amount of material removal.
Try to keep both sides as symmetrical as possible.
This is important because an improperly balanced blade can cause vibration when the mower is running.
Step 7: Check the Blade Balance
After sharpening, check the blade’s balance using a mower-blade balancing tool if you have one.
An unbalanced blade can create excessive vibration and place unnecessary stress on the mower.
If one side drops significantly lower than the other, remove a small amount of material from the heavier side and check the balance again.
Don’t keep removing metal simply to make the blade extremely sharp.
Step 8: Reinstall the Blade
Once the blade is clean, sharp, and balanced, reinstall it according to the mower manufacturer’s instructions.
Make sure the blade is facing the correct direction and that the retaining bolt is tightened to the manufacturer’s specified torque.
Reconnect the spark-plug wire or reinstall the battery only after everything is securely back in place.
An Important Safety Note
You may see online tricks involving sharpening a mower blade while it is still attached to the mower or using improvised objects to sharpen it.
Those shortcuts aren’t worth the risk.
The blade can move unexpectedly, and working around an exposed mower blade without properly securing the machine can result in serious injury.
The safest approach is to disconnect the power source, remove the blade, secure it properly, and sharpen it with an appropriate tool.
How Often Should You Sharpen a Mower Blade?
There isn’t one exact schedule for every lawn.
For many homeowners, checking the blade periodically during the mowing season is more useful than following a strict calendar.
Consider inspecting it when:
- The grass suddenly looks ragged after mowing
- The mower begins vibrating more than usual
- The mower seems to struggle through ordinary grass
- You notice visible nicks along the cutting edge
- You’ve accidentally hit rocks, roots, or other hard objects
Heavy use or rough terrain may require more frequent sharpening.
When You Should Replace the Blade Instead
Sharpening isn’t always the answer.
Replace the blade if you discover:
- Cracks
- Severe bends
- Deep damage
- Excessive corrosion
- A badly worn cutting edge
- Damage that prevents proper balancing
A mower blade is a relatively inexpensive component compared with the potential consequences of using a damaged one.
A Simple Grandpa-Style Maintenance Routine
My grandpa’s philosophy was simple: don’t wait until something becomes a major problem.
Before mowing, take a moment to check the mower.
Look underneath for packed grass, inspect the blade for obvious damage, and make sure the mower is clean and ready to work.
After several mowing sessions, inspect the blade more carefully. A few minutes of maintenance can prevent a small problem from turning into an expensive repair.
Can You Sharpen a Mower Blade Without Removing It?
Some people do use sharpening tools while the blade remains installed, but removing and securely clamping the blade generally gives you much better control over the sharpening angle and allows you to inspect the blade properly.
For safety, follow your mower manufacturer’s instructions rather than relying on an improvised shortcut.
Final Thoughts
My grandpa’s mower-blade trick wasn’t really about using a magical tool. It was about keeping things simple: remove the blade safely, secure it firmly, follow the existing bevel, use controlled strokes, and check the balance afterward.
You don’t need to grind away half the blade to make it work better. A properly maintained, evenly sharpened blade can help your mower produce a cleaner cut and make routine lawn care easier.
Sometimes the old-fashioned approach really is the simplest one—but when you’re working with spinning mower blades, simple should never mean unsafe.
SEO Title
My Grandpa Taught Me This Trick to Sharpen Lawn Mower Blades With Almost 0 Work
Meta Description
My grandpa’s simple lawn mower blade sharpening trick can make routine maintenance easier. Learn how to sharpen, balance, and reinstall a mower blade safely at home.