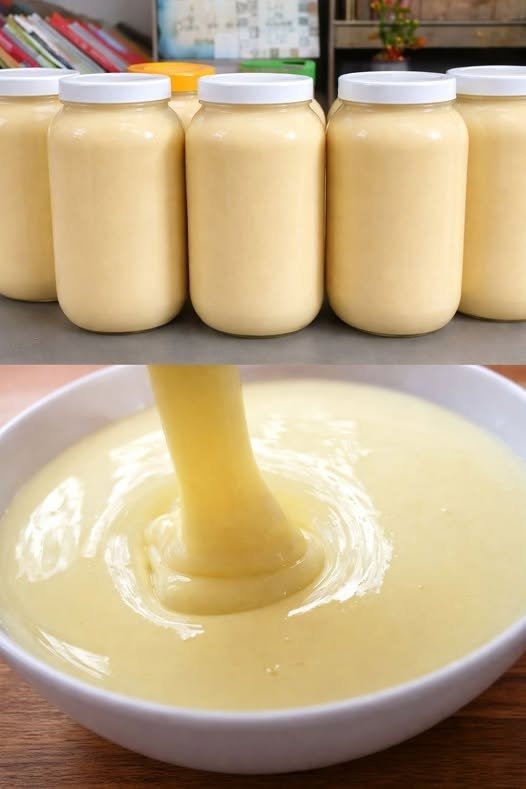
Making homemade condensed milk doesn’t have to be complicated. This easy sugar-free condensed milk recipe requires just 3 simple ingredients and creates a creamy, rich, and delicious alternative to traditional sweetened condensed milk.
It’s economical, easy to prepare, and perfect for anyone looking to reduce their sugar intake while still enjoying the creamy texture condensed milk adds to desserts and drinks.
Use it in coffee, tea, puddings, cakes, cheesecakes, ice cream, fudge, and many other homemade treats.
Why You’ll Love This Recipe
- Only 3 ingredients
- No regular sugar
- Easy to make at home
- Creamy and rich
- Budget-friendly
- Great for low-sugar desserts
- Can be prepared ahead of time
- Useful in both desserts and drinks
Ingredients
- 2 cups whole milk
- 2 tablespoons unsalted butter
- ¼–½ cup powdered sugar substitute, such as powdered erythritol or another suitable granulated sweetener
The amount of sweetener can be adjusted depending on your preferred level of sweetness.
Instructions
Step 1: Combine the Milk and Butter
Pour the milk into a medium-sized, heavy-bottomed saucepan.
Add the butter and place the saucepan over low to medium-low heat.
Stir gently until the butter has completely melted into the milk.
Do not allow the mixture to boil aggressively. Gentle heating helps prevent the milk from scorching.
Step 2: Reduce the Milk
Once the butter has melted, continue cooking the mixture over low heat.
Stir frequently, especially around the bottom and edges of the pan.
The goal is to slowly evaporate some of the water from the milk, leaving behind a thicker and creamier mixture.
This process can take approximately 20–30 minutes, depending on the size of your saucepan and the heat level.
Avoid turning the heat too high. Cooking too quickly can cause the milk to scorch or develop an unpleasant flavor.
Step 3: Add the Sweetener
Once the milk has reduced and become noticeably thicker, remove the saucepan from the heat.
Add your powdered sugar substitute.
Whisk thoroughly until the sweetener has completely dissolved and the mixture is smooth.
Using powdered sweetener helps prevent a gritty texture.
Step 4: Cool
Allow the condensed milk to cool at room temperature for several minutes.
Don’t worry if it seems slightly thinner than expected while hot. The mixture will continue to thicken as it cools.
For an even thicker consistency, refrigerate it for a few hours.
Step 5: Store
Transfer the cooled condensed milk to a clean, airtight glass container.
Keep refrigerated and use it within approximately 5–7 days, depending on the freshness of your ingredients and storage conditions.
Always use a clean spoon when removing portions from the container.
How to Get the Best Texture
The key to homemade condensed milk is patience.
Keep the heat low and allow the milk to reduce gradually. Rapid boiling can cause the milk to scorch and may create a grainy or unpleasant texture.
For the smoothest result:
- Use whole milk.
- Use a heavy-bottomed saucepan.
- Stir regularly.
- Avoid high heat.
- Use powdered sweetener.
- Allow the mixture to cool completely before judging its final thickness.
If Your Condensed Milk Is Too Thin
If the mixture isn’t as thick as you’d like, return it to the saucepan and cook it over low heat for a few additional minutes.
Stir continuously while it reduces.
Remember that the mixture will become thicker once refrigerated, so avoid reducing it too much while it’s still hot.
If Your Condensed Milk Is Too Thick
If your finished condensed milk becomes too thick, whisk in a small amount of warm milk until it reaches your desired consistency.
Add the milk gradually so you don’t accidentally make it too thin.
Ways to Use Sugar-Free Condensed Milk
This homemade condensed milk is incredibly versatile.
Coffee
Add a spoonful to hot coffee for a creamy, sweet, café-style drink.
Tea
Stir a small amount into black tea or chai for extra richness.
Cheesecake
Use it as part of a creamy cheesecake filling where a recipe calls for condensed milk.
Pudding
Mix it into homemade pudding or custard for additional creaminess.
Ice Cream
Use it as a base ingredient in homemade no-churn ice cream recipes.
Cakes
Add it to cake batters, fillings, or frostings when you want extra richness.
Fudge
It can also be incorporated into homemade fudge and other creamy candies.
Recipe Variations
Vanilla Condensed Milk
Add ½ teaspoon of vanilla extract after removing the mixture from the heat.
This gives the condensed milk a pleasant vanilla aroma and flavor.
Coconut Condensed Milk
For a dairy-free variation, use full-fat coconut milk and a suitable dairy-free butter alternative.
The coconut version has a naturally rich and tropical flavor.
Extra Creamy Version
Replace a small portion of the milk with heavy cream for a richer, thicker result.
Important Note About “Sugar-Free”
Although this recipe contains no regular table sugar, the nutritional content depends on the type of milk and sweetener you use.
Also, not every sugar substitute behaves exactly like sugar when heated or refrigerated. Some sweeteners can crystallize or leave a cooling sensation.
For the smoothest texture, choose a powdered sweetener designed to dissolve easily.
Frequently Asked Questions
Can I use skim milk?
You can, but whole milk generally produces a richer and creamier result. Lower-fat milk may produce a thinner condensed milk.
Can I use regular powdered sugar?
Yes, but then the recipe will no longer be sugar-free.
Can I use liquid sweetener?
You can experiment with liquid sweeteners, but they may change the consistency. A powdered sweetener is generally easier to incorporate into this recipe.
Why is my condensed milk grainy?
The sweetener may not have dissolved completely, or the mixture may have been cooked at too high a temperature. Using powdered sweetener and gentle heat can help produce a smoother texture.
Does it thicken after cooling?
Yes. Homemade condensed milk usually becomes noticeably thicker as it cools and chills.
Storage
Store the finished condensed milk in an airtight container in the refrigerator.
For the best quality, use it within 5–7 days and discard it if you notice an unusual smell, appearance, or texture.
Recipe at a Glance
Prep Time: 2 minutes
Cook Time: 20–30 minutes
Cooling Time: 30 minutes
Total Time: About 1 hour
Servings: Approximately 1 cup
Difficulty: Easy
Final Thoughts
This 3-Ingredient Sugar-Free Condensed Milk is a simple and economical homemade alternative when you want the creamy sweetness of condensed milk without using regular sugar.
With just milk, butter, and a suitable sugar substitute, you can create a versatile ingredient that can be kept in the refrigerator and used in all kinds of homemade desserts and drinks.
The most important trick is to cook it slowly over low heat and give it enough time to reduce. Once cooled and chilled, you’ll have a creamy homemade mixture ready to add to your favorite recipes.